Ever wondered why one side of your headphones is keeping dead silence while the other blasts your favorite tunes? The struggle is real, we feel your pain. Dealing with headphones that only play music in one ear can be incredibly frustrating. Don’t worry, you’re about to become your personal headphone technician.
In this detailed guide, we’ll peel back the layers of your headphones, from understanding their anatomy to exploring the reason behind your one-sided silent treatment. We’ll assess software issues, inspect jacks, carry out a sound test, and yes, even delve into the DIY fixes. And if all else fails? We’ve got alternatives and some interesting insights into the great debate: wireless vs wired.
Strap in, arm yourself with your faulty headphones, and let’s embark on this journey together. No jargon, no technobabble, just plain English solutions to get both sides of your headphones ringing in melodious harmony again.
Understanding the Anatomy of Your Headphones
Ever found yourself wondering about the inner workings of your headphones? Let’s break it down. Generally, headphones consist of several key components that contribute to the magic of sound. Understanding these components will arm you with the knowledge to diagnose potential issues when one side of your headphones stops working.
Here are the primary elements you need to be aware of:
- Headphone Jack: The jack, or plug, is the part that you insert into the audio device. It comes in different sizes, the most common being 3.5 mm, used mainly in headphones and earphones.
- Audio Cable: This is the wire that transmits the sound from your audio device to the speakers in your headphones. Squashed cables can lead to sound issues, such as sound only coming from one side of your headphones.
- Ear Cup: This is the part of the headphone that covers your ears. Inside the ear cup, you can find the speaker sitting. The size and material of the ear cup can play a role in the quality of sound.
- Speaker: The speaker, or driver, is the heart of your headphones. This is where sound waves are created. Creator of the actual sound you hear, the speaker vibrates creating the sound waves which reach your ears.
You may also be aware that today we have simple traditional wired headphones as well as more advanced wireless or Bluetooth headphones. While the basic components remain the same, wireless headphones also include an additional battery component and Bluetooth receiver. Both of these can complicate troubleshooting, as they add more potential areas for things to go wrong.
Whenever you encounter a problem with your headphones, start by understanding the part that’s not working, and then proceed to diagnose and fix the issue from there. In this way, understanding the anatomy of your headphones is the first step to becoming your own headphone technician.
Identifying the Cause: Why is One Side of Your Headphones Not Working?
Are you finding yourself constantly adjusting your headphones, trying to get sound out of both ears? Don’t worry, you’re not alone. Many of us have been in your shoes and understand how frustrating it can be. But before we dive into all possible solutions, we need to identify the cause. A little bit of investigative work can go a long way in solving your problem.
The issue of one side of your headphones not working could be due to a variety of reasons. These range from simple things like a loose connection or dirty headphone socket to more complex issues, such as internal wiring faults. We also can’t rule out the possibility that it could be a software or hardware issue.
- Loose Connection or Dirty Headphone Socket: Dirt, lint, or other debris in the headphone socket could be hindering your audio experience. Similarly, a loosely connected headphone plug can also cause this issue. These are probably the simplest causes to fix.
- Internal Wiring Faults: With time and regular usage, the internal wires of your headphones can get damaged or become faulty. Such faults often result in sound working on one side only.
- Software or Hardware Issue: Sometimes, the problem might not be with your headphones at all. Your device’s audio settings or internal hardware may be causing the issue.
Remember, the first step towards fixing a problem is identifying the cause. Once you’ve figured out why one side of your headphones isn’t working, you’re already halfway to a solution. So, let’s get your headphones functioning perfectly on both sides. Stay with us as we walk you through the process, step-by-step.
Checking for Software Issues: Is it Your Device or Your Headphones?
Let’s be Sherlock Holmes for a moment here—eliminating the impossible, whatever remains, no matter how improbable, must be the truth. So, before starting unscrewing parts of your headphones or running to the store for a new pair, it’s important to check if the issue isn’t software related.
Yes, often, it could be your device that’s causing the problem and not your headphones. And yes, it does make you sigh in relief, doesn’t it? So let’s get started with figuring out this side of the story.
Firstly, connect your headphones to a different device. This could be your friend’s phone, tablet, or another computer. If it’s working fine with the other device, then the issue lies within your device. However, if the same problem persists, it’s time to look into your headphones.
In case the problem is with your device, here are a few things you could do:
- Check your audio settings: The balance settings on your device could be off, with the balance skewed to one side. To rectify this, navigate to the sound settings, find the balance controls, and ensure that they are centered.
- Update your device software: A software update might resolve any unknown issues causing the problem. So, check if there’s an update available for your device.
- Restart your device: As simple as it seems, restarting the device can fix various minor glitches. Hence, give it a try!
Don’t let the software issues trick you into thinking that your headphones have given up on you. Sometimes, all it takes is a little tweak in the settings, and presto! Your headphones are back to their harmonious best.
Remember, a detective never jumps to conclusions. So, ensure to consider all possibilities before making a verdict. After all, in detective work, there’s nothing so insignificant!
Taking a Closer Look: Inspecting the Headphone Jack
Now, it’s time to put that detective hat back on and move on to another potential cause of our one-sided headphone mystery – the headphone jack. A damaged or dirty headphone port could be all that separates you from fully operational headphones.
Firstly, visually inspect the headphone jack. Look for any obvious traces of damage, like bent pins, dust, or debris. However, keep in mind that not all problems will be clearly visible. To make sure, we’ll need to perform a few simple tests.
Start by gently wiggling the headphone plug when it’s inserted into the port. If the sound suddenly comes back on the dead side while wiggling it, then the issue most likely lies in the jack.
Note: Remember to treat your headphones and their port with tender loving care. Any rigorous or forceful actions might create new problems or further damage!
If you’re dealing with a dirty headphone jack, the best tool to use is a can of compressed air. Give it a gentle blow to dislodge any dust or debris. Failing that, a cotton swab lightly dabbed in alcohol can often do the trick. Just be sure the alcohol has completely evaporated before you plug the headphones back in.
In the unfortunate scenario where you discover a damaged headphone jack, you might be in for a repair job. If you’re handy with DIY, it can be quite a simple process. There are plenty of guides available online to help you with this. However, if you’re not comfortable doing this, consider seeking help from a professional.
Always remember the goal; get both sides of your headphones producing sweet melodies once more! Let’s take a step further and explore another potential culprit – the audio cable.
DIY Fixes: Simple Solutions for Headphone Troubles
Getting your headphones to work optimally again doesn’t always require professional help. It can be as simple as a couple of do-it-yourself fixes. When neither the software of your device nor the headphone jack is the problem, here are a few more options to consider.
Check the Audio Balance
If it’s not the hardware causing the issue, it might be your device settings. There’s a feature on most devices that will let you adjust the audio balance. Principally used for people who might have a hearing difficulty in one ear, inadvertently changing the balance can cause audio issues. If the slider is pushed all the way to the left or the right, it’ll only play sound on that side.
- To rectify this, venture into the sound settings on your device.
- Find the ‘Audio balance’ control and ensure that it’s centered.
- Try using your headphones again.
Try A Different Adapter
When the issue is not with the jack or the audio balance, it might be the adapter you’re using. Certain adapters may not be compatible with your headphones, causing one side not to work. Try a different adapter to see if that resolves the problem.
Inspect the Sound Controls on the Headphone
At times, you might be dealing with malfunctioned sound controls on your headphones themselves. Built-in volume controls or mute buttons can often lead to one-sided audio when not functioning properly. If possible, try to bypass these by using the volume controls on your device instead.
Audio Driver Updates
Lastly, your audio driver could be out-of-date, potentially causing complications with proper audio delivery. Regularly updating your audio drivers ensures they’re running their best. In most cases, you can download new drivers directly from the manufacturer’s website.
By following these simple DIY fixes, you can potentially alleviate your headphone frustrations and get back to enjoying your audio properly. If these steps don’t solve your headphone woes, don’t worry, there are more solutions coming up in the following sections.
Cleaning Your Headphones: A Hidden Solution
If you’re puzzled why one side of your headphones isn’t working, there might be a surprisingly simple solution. Have you considered cleaning your headphones? Dirt, dust, and earwax can accumulate and potentially block sound from coming out of your earbuds, causing an imbalance in audio output.
When was the last time you gave your headphones a good clean? Even if it’s a routine part of your maintenance, you might have missed out on scrubbing certain parts that require your attention. So, let’s get your cleaning supplies ready and work on reviving your headphones!
Cleaning the External Parts of Your Headphones
For the outer parts of your headphones, a simple wipe should do the trick. Here’s a short guide:
- Ensure your headphones are unplugged or switched off. Safety first, always!
- Use a dry microfiber cloth to gently wipe down the headphone. This will remove any dust particles on the surface.
- For stubborn smears or stains, dampen a portion of the cloth with a bit of warm water and delicately wipe the affected area.
- For headphone cushions, consider removing them and cleaning separately according to the manufacturer’s instructions. Often, a mild soap can be used with water.
- Make sure to dry your headphones thoroughly with a soft, clean cloth before using them again.
Cleaning the Earbuds
Earbuds require special attention – especially if they have the in-ear type of design. Cleaning them properly can ensure clear sound quality. Here’s how you can do it:
- Remove the ear tips from each earbud.
- Submerge the ear tips in warm, soapy water and let them soak for around five minutes.
- Use a soft brush or cloth to gently clean the earbud. Avoid using sharp or metal objects as they can damage delicate parts.
- Rinse the ear tips thoroughly and let them air dry on a clean cloth or paper towel.
- While the ear tips are drying, use a dry toothbrush or soft cloth to gently wipe down the headphone speaker mesh.
- Once everything is dry, reattach the ear tips to your earbuds.
Remember: Never submerge your headphones or earbuds in water unless they are designed as waterproof. Always check your device’s water resistance rating before cleaning with liquids.
Through proper routine cleaning, you can give your headphones the longevity they deserve while ensuring optimal sound quality. A clean headphone is a functional headphone. Check your headphones again, the issue might have resolved itself just with a touch of tidiness!
Performing a Sound Test: Pinpointing the Problem
Let’s dive straight into performing a sound test – a simple and efficient method of diagnosing your Headphone blues right in your home. No fancy equipment or specialist knowledge required, just your headphones and a few minutes of your time.
Here’s how you can get to the bottom of the issue:
- Switch the Sides: Try to use the right headphone in the left ear and vice versa. If the working side stops functioning, you have discovered your culprit. It’s possible that the headphone speaker itself is at fault.
- Try Different Devices: Plug your headphones into a different device. If they work correctly, the issue may reside with your original device. You should consider looking into the software and settings.
- Use Various Applications: Run different audio applications on your device. Sometimes, specific apps are incompatible with certain headphones. If the problem continues across all applications, it’s more likely a hardware issue.
These tests will help you pinpoint where the problem is and gives you a clear direction on what to do next. Sound tests are just a stepping stone to understanding what’s going wrong with your headphones.
Methodological Troubleshooting
Once you’ve nailed down the source of your problem, you can systematically troubleshoot your headphones. Start from your test results and work your way through potential solutions.
Remember, patience is your ally when troubleshooting headphones. Sometimes, the simplest solution works; other times, it can be a mix of faults. But with methodical testing, you’ll identify the problem and, in many cases, fix it yourself.
Let’s move forward, keeping the results of your sound tests in mind, and explore the different ways you can restore balance to your headphones.
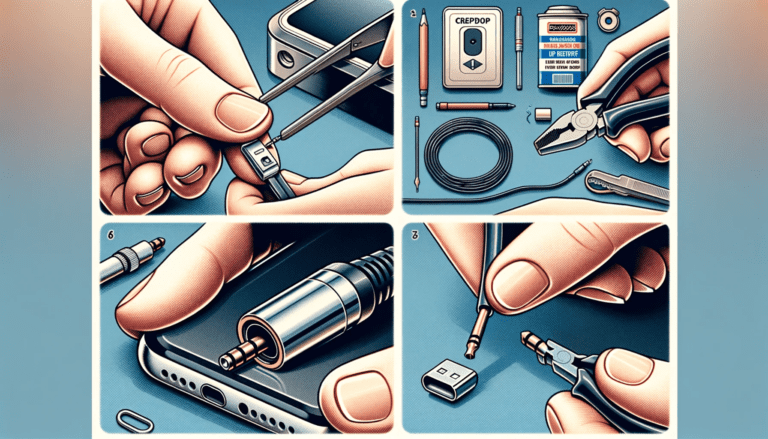
Replacing the Audio Cable: A Step-by-Step Guide
Does the problem persist? Fear not! Perhaps it’s time to consider replacing your headphone cable. Occasionally, due to wear and tear, the wires inside the headphone cable break, causing a loose connection and generating sporadic sound. Replacing the cable isn’t as daunting as it sounds and can be the final stitch to mend your beloved headphones. Here’s how:
- Get the essentials. All you need is a new headphone cable, which you can find online or at your local electronics store. Usually, it’s best to invest in a quality cable, even if it’s a bit pricier. Remember, you can’t put a price on good sound quality.
- Remove the old cable. Disconnect the existing wire that’s causing issues. In most cases, this process involves unscrewing a small part of your headphones to reveal the socket where the wire is connected. Remember, gentle hands make light of hardware work!
- Insert the new cable. Insert the new wire into the socket once you’ve removed the old one. Ensure that it fits perfectly as a loose cable can degrade sound quality. Don’t force it, frustrations can lead to unintentional mishaps!
- Screw everything back in place. Once you’ve securely attached the new wire, it’s time to reassemble your headphone. Screw everything back in place, ensuring everything is tight but not overly forced.
- Test it. The proof is in the earing. Play some of your favorite tunes to test if the sound is clear and balanced. Keep an ear out for any distortions or loss of audio in either channel. If you’ve followed these steps to the letter, you should be back to immersive, sound-rich euphoria.
Please note, for some headphone models, this process might slightly vary. Always refer to your headphone manual or the manufacturer’s website for model-specific instructions. However, regardless of the model, the fundamental steps remain the same: remove, replace, reassemble, and rock!
Fixing headphones isn’t just about saving money; it’s about rekindling the connection with your favorite piece of technology. With this guide in your arsenal, you won’t be defeated by a faulty headphone cable. With a little patience, precision, and practice, you will master the art of headphone maintenance in no time.
Resolving Bluetooth Connectivity Issues
Bluetooth headphone users often face connectivity issues that could be the reason why a headphones’ side is not working. Understanding and troubleshooting Bluetooth connectivity issues can help you fix the problem and prevent it in the future.
Before diving into the solutions, it’s crucial to understand what could be causing Bluetooth connectivity issues. Misconfigured settings, outdated drivers, physical obstacles between headphones and the device, low battery life, or even interference from other Bluetooth devices can cause connectivity issues.
Here are some proven steps to troubleshoot Bluetooth connectivity issues:
- Power-cycle your devices: Restarting your devices often solve many technical glitches, including Bluetooth connectivity issues. Turn off both your device and the headphones and wait for at least one minute before turning them back on.
- Check battery life: A low battery can disrupt Bluetooth’s performance. Make sure both your device and headphones are sufficiently charged.
- Ensure your Bluetooth is enabled: It may sound obvious, but sometimes, the Bluetooth feature on your device may be turned off by accident.
- Remove physical obstacles: Bluetooth signals can be impaired by physical barriers. Try to minimize the distance and remove obstacles between your device and the headphones.
- Update your device: If your device’s software or Bluetooth drivers are outdated, it can affect Bluetooth connectivity. Regularly update your device to make sure it stays compatible with your headphones.
- Unpair and then pair again: If you continue to face connection issues, try unpairing your headphones from your device and then pairing them again.
Remember, Bluetooth connectivity issues can vary depending on your headphone model and the device to which you’re connecting. Always consult your device’s user manual or the manufacturer’s website for more specific troubleshooting steps.
If your headphones are still not working after trying these solutions, the problem might be something else. In the following sections, we’ll explore more possible causes and fixes.
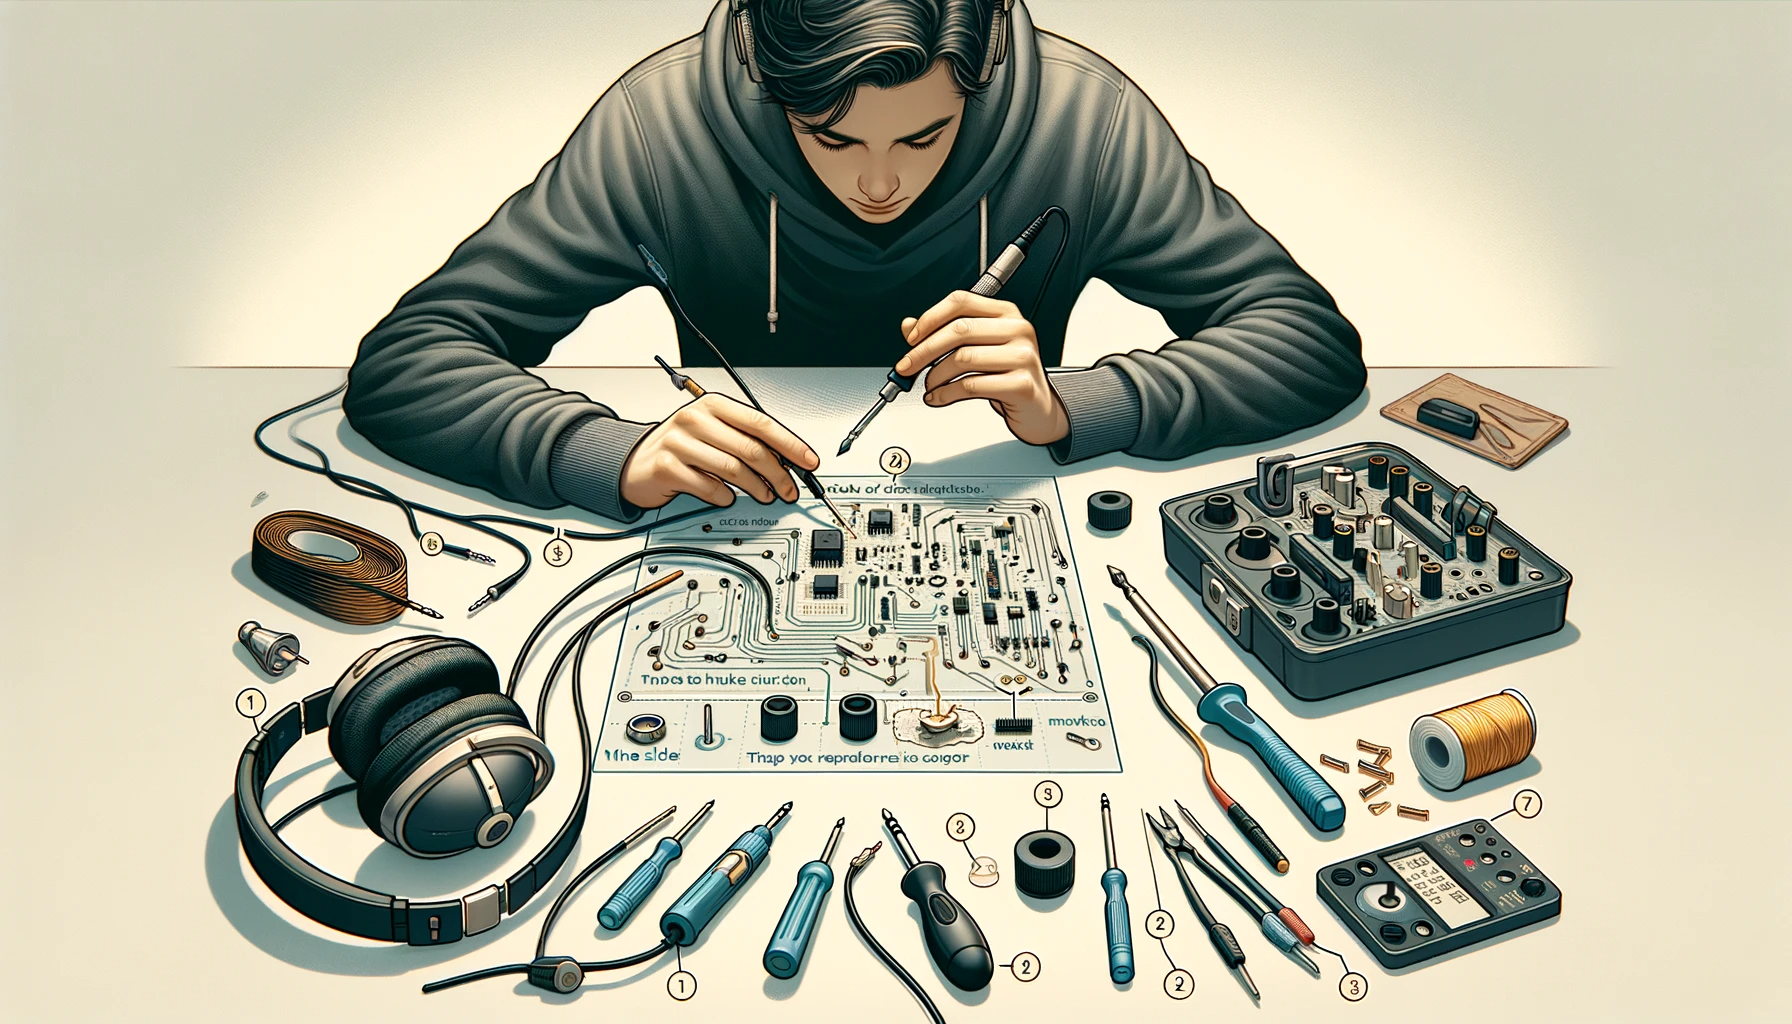
Checking for Possible Broken Wires: A Handy Guide
Don’t you just hate it when one side of your headphones stops working? More often than not, the root cause lies in the wiring. Let’s dig in and find out if a broken wire is causing your sonic trouble.
Before we start, it’s important to note that this process requires careful observation and a bit of patience. As they say, a stitch in time saves nine. So, armed with a magnifying glass and a bright light, here’s what you need to do:
- Detection: Begin by thoroughly inspecting your headphone cable. Are there any visible signs of wear and tear? Look for any kinks, cuts, or exposed wires along the length of the cable.
- Preliminary Trial: Try adjusting the wire while the music is playing. Bend it at different points along the cable. If the sound comes back even momentarily, then there’s a break in the wire at that point.
- Twist Test: With the audio still playing through your headphones, gently twist the cable in a corkscrew motion. Start at one end of the cable and slowly work your way towards the other end. Listen carefully. If the sound ‘pops’ back in or out, you’ve found yourself a broken wire.
If you conclude that a broken wire is the culprit, you have a couple of options. You can try to repair the cable yourself, replace the entire cable if possible, or consider professional repair services if the task seems daunting (we’ll talk more about these solutions in later sections). On the bright side of things, knowing the problem is a strong stride towards fixing it.
Remember: If you choose to repair the cable yourself, safety first! You’ll be dealing with exposed wires which can lead to minor shocks. And, if you’re not confident in repairing it or if the damage seems severe, it’s wiser to opt for professional repairs instead of risking further damage.
When to Consider Professional Headphone Repair Services
It’s often exhilarating when you can fix a problem with your headphones yourself. However, there are some situations when turning to professional repair services becomes inevitable. So, how do you determine if your beloved headphones need an expert touch? Let’s figure this out.
One surefire sign that it’s time to reach out to the pros is when you’ve exhausted all DIY fixes and the problem persists. Remember, our aim is not just to get the sound back, but to ensure your headphones deliver their best possible performance. Constantly putting them through uncertain DIY fixes could potentially lead to more damage, so it’s advisable to seek professional help when in doubt.
Also, if you sense that the problem is far more complex than a simple wire twist or a minor software glitch, such as internal wiring problems or audio driver malfunctions you’re unable to diagnose, it’s safer to let the experts handle it.
Another instance to consider professional services is when your headphones are of high-value or a classic model. These devices can be expensive to replace and have intricate internal systems that might be damaged by inexperienced repair attempts. In this case, professional services can breathe new life into your most cherished sound accessories.
In addition, if your headphones come with warranty, it is always smarter and cost-effective to make use of it. Going the DIY route or resorting to local repair shops could void your warranty. So, if problems arise within the warranty period, taking advantage of professional services ensures a sure, safe and cost-effective repair.
Finally, it’s necessary to take into account the time cost. If you’re finding that you’re spending an excessive amount of time trying to figure out and resolve the issue, it may ultimately be cheaper and easier to get a professional involved. After all, you should be enjoying your music, not wrestling with wiring and drivers.
To sum up, knowing when to turn to professional repair services can save a lot of hassle, potentially prevent further damage to your headphones, and ensure the best sound experience for you. Don’t hesitate to reach out to the pros when the situation calls for it. Your headphones, and your ears, will thank you!
Preventing Future Issues: Care Tips for Your Headphones
Proper headphone care can go a long way in preventing future issues that can impair their performance. Here, we delve into some handy care tips for your headphones to ensure they last longer and remain as reliable as ever.
- Pull the plug, not the cord: Always remove your headphones by grabbing the plug and not the cord. This can help prevent possible wire damage and prolongs the life of your headphones.
- Safe storage: Don’t just stuff your headphones into your pocket or bag. Instead, invest in a proper headphone case to protect them from potential harm, like moisture, dust, and physical damage. For earbuds, a small carrying case can do the trick.
- Regular cleaning: As we discussed in the cleaning section, maintaining the hygiene of your headphones is also assured. Regular cleaning can prevent buildup and blockages that can affect sound performance.
- Avoid excessive bending: Avoid sharply bending the headphone cord. Too much twisting can strain the wires inside and eventually lead to damage.
- Keep them dry: Headphones and moisture don’t mix. Whether it’s from sweat, rain, or an accidental plunge into water, moisture can harm electronic components. If they get wet, dry them out thoroughly before using them again.
Remember, prevention is always better than cure. By following these handy tips, you can ensure your headphones stay in tip-top shape for longer, delivering the best sound quality possible. Good headphone maintenance is a worthy investment in the long run, saving you not only upkeep costs but also the time and hassle of troubleshooting and repair.
Moreover, make sure you also keep the warranty details and receipt of your headphones handy. This can be useful if any unexpected issues arise and you require professional support. We will delve into the details of headphone warranty in the next section.
Understanding Your Headphone Warranty: When to Claim
Your device’s warranty can come in handy at times like these. A warranty is basically a guarantee that the manufacturer grants, promising to repair or replace your headphones if certain circumstances arise. It’s like a security net, ensuring you don’t have to bear unnecessary expenses.
Identifying When to Claim Your Warranty
First, it’s important to understand when you should consider claiming your warranty. As rules vary from one manufacturer to another, we’ve listed some general scenarios:
- Notable sound quality decline and you’ve tried all potential fixes
- Physical damages such as broken headband, ear cup, or wire that you didn’t cause
- One side of the headphones ceases to function and multiple tests have ruled out device, software, or user issues
- In case of wireless headphones, persistent Bluetooth connectivity issues despite troubleshooting efforts
Your warranty could cover any of these issues, depending on the terms and conditions set by the manufacturer. It’s recommended to read the warranty policy closely to ascertain your eligibility for claims.
Pro Tip: Remember, a warranty typically won’t cover damages caused by misuse, carelessness or personal modifications, so ensure to handle your headphones with care!
Claiming Your Warranty
Knowing how to claim your warranty is equally important. Here’s how you can do it:
- Reach out to the customer service of the manufacturer. They can guide you through the process and also determine if the issue qualifies for a warranty claim.
- Gather the necessary documents. Typically, you’ll need proof of purchase like a receipt or invoice. Some may also request the original product packaging or other accessories included with the headphones.
- Describe the issue in detail when submitting your claim. Providing explicit information might expedite the claim process and increase your chances of approval.
- Follow the manufacturer’s instructions for shipping the product if required. Some may provide prepaid shipping labels, while others might require you to cover this cost.
Remember that patience is crucial here. Warranty claims might take time to process, so it’s best to have an alternative set of headphones handy for the time being.
Note: It is crucial to act promptly when you notice any issue. Most warranties have a specific timeframe. If the warranty has expired, you might have to pay for any repair or replacement, even if it’s a manufacturing defect.
In conclusion, the ‘Understanding Your Headphone Warranty’ aspect is integral in the event of non-working headphones. Taking the time to understand your warranty’s stipulations can potentially save you time, effort, and money!
Exploring Alternative Solutions: When All Else Fails
Let’s face it: it’s frustrating when none of the solutions work out. One side of your headphones is still stubbornly silent. Ready for some alternative ways? Here are some novel solutions that might just get the smooth sound filters back on track!
Remember, it’s crucial to always take safety precautions when working with electronic devices. Avoid working in an area with excessive static electricity, and don’t poke around too deeply in areas with delicate components. Your safety comes first!
Firstly, consider rebooting your device. Shocked? As straightforward as it may seem, sometimes powering down and restarting the device can help rectify glitches that might have gone unnoticed earlier.
Next, another idea might be to reset your headphones. Each brand and model has a unique method of resetting, so find yours from instructions usually available in the user manual or the product’s online help center.
Are you using Bluetooth headphones? If yes, the problem could be a lagging Bluetooth connection. Try re-establishing the connection or pairing the headphones with a different device to check if the issue persists.
If none of these work, don’t be disheartened! There’s one more potential lifesaver to try: updating your device’s firmware. The problem could be a result of outdated software that is triggering compatibility issues with your headphones. Find instructionsleshooter: Most operating systems provide built-in audio troubleshooters that can detect and fix any software or driver-related issues.
Online Forums: Don’t underestimate the power of community-based forums like Reddit, Quora, or even the product’s own customer forum. There’s a likelihood that someone has faced a similar problem and you might find their solution beneficial.
Manufacturer Support: Finally, your headphone manufacturer’s support team might be able to lend a hand. Check their website for chat, email, or phone support opportunities.
Above all, remember that patience is key when troubleshooting electronic devices. Take deep breaths and keep a calm head. There’s always music at the end of the tunnel!
Wireless Vs Wired Headphones: Common Issues and Fixes
When it comes to headphone hiccups, the problems you’ll face can differ depending on whether you’re using wired or wireless models. Let’s separate these two and zoom in on their common issues, and of course, how to fix them.
Issues Common to Wired Headphones
- Audio only in one ear: This is typically a sign of a broken wire or a problem with the jack. The steps above have covered this extensively, but succinctly, you’d need to inspect the cable for any obvious signs of damage, then perhaps, try replacing the audio cable or consider professional repair.
- Static noise: If you’re hearing a crackling noise, there might be a loose connection. Try jiggling the cable gently while the audio is playing to see if you note any changes. This could help you pinpoint the area where the issue might be.
Issues Common to Wireless Headphones
- Poor connection: Issues like intermittent sound, difficulty pairing, or complete lack of connectivity may arise. Most of these are usually solved by simply resetting your device’s Bluetooth settings or updating them, if available. Always ensure that your device is within the specified range of your headphones.
- Shortened battery life: Over time, the battery life in your wireless headphones may get shorter. Maintain them by charging correctly and not letting the battery drain too often. If the problem persists, consider getting the batteries replaced professionally if your model allows it.
Remember, wired or wireless, each type of headphone comes with its own set of challenges. But, don’t worry, with the right tools and tips, you can combat these issues and keep your favorite tunes playing, perfectly balanced, in both ears.
Conclusion
In wrap-up, fixing a headphone issue when one side is not working is largely a matter of understanding exactly what could be the problem. By intimately knowing your headphone’s make-up, you can better establish whether the issue lies in software discrepancies or hardware malfunctions.
DIY solutions are available such as adjusting audio balance, inspecting sound controls, or keeping your headphones clean. Moreover, you may need to check for broken wires or bluetooth connectivity problems. Always bear in mind your headphone’s warranty conditions before proceeding with a fix.
Finally, should you still face issues, it might be time to consider professional services or explore alternative solutions. So, with a little patience and investigative work, you can reclaim the full functionality of your headphones, and enjoy your favorite tunes without interruption.
FAQs (Frequently Asked Questions)
1. Why are my headphones only working on one side and not both?
If your pair of headphones are only providing sound on one earbud, it could be due to several reasons such as a faulty audio jack, issues with the audio source, or a problem with the headphones themselves. It’s essential to troubleshoot to identify the exact cause and then proceed with the appropriate fix.
2. What are the common methods to fix headphones that only work in one ear?
There are several ways to fix headphones that only work in one ear. These can include checking the audio source, testing the headphones on another device, ensuring a secure connection at the audio jack, and adjusting the sound balance or audio enhancements.
3. Can the issue of sound from one side of the headphones be related to the type of headphones used?
Yes, the problem of sound only coming from one side could be associated with the type of headphones. This issue can occur with both wired and wireless headphones, as well as bluetooth earbuds. Regardless of the type, it’s important to troubleshoot and fix your headphones to restore the audio balance.
4. How do I determine if there’s a problem with my audio source or the headphones themselves?
To determine whether the issue lies with the audio source or the headphones, it’s recommended to test the headphones on another device. If the headphones work properly on the new device, the audio source may be the cause. However, if the problem persists, the headphones themselves are likely the issue.