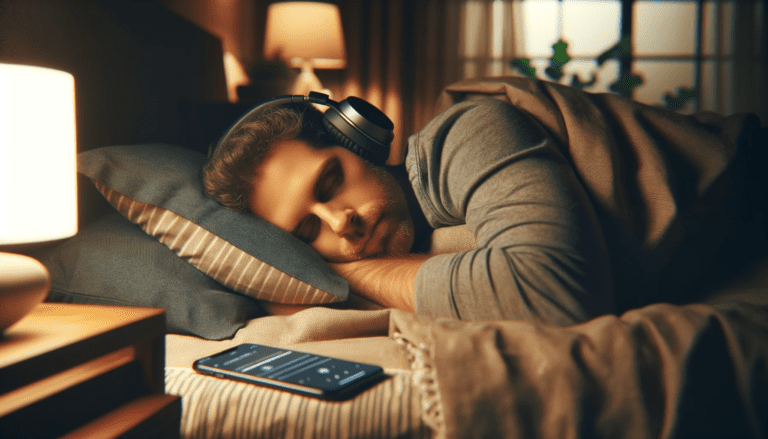
Bluetooth headphones have become an indispensable part of our daily lives, providing a convenient and wire-free audio experience. However, users often encounter the frustrating issue of the blue light on their Bluetooth headphones blinking bizarrely, indicating a problem with the connection.
This article offers quick fixes to prevent your Bluetooth headphones from acting up, ensuring a stable and uninterrupted listening experience. From pairing procedures to battery management, we cover essential steps to troubleshoot and resolve common Bluetooth connectivity issues.
Key Takeaways
- Ensure proper pairing by charging headphones, enabling Bluetooth, and entering pairing mode; reset if necessary.
- Disable notifications and perform a quick Bluetooth toggle to resolve audio interruptions and maintain connectivity.
- Check for physical barriers and maintain optimal distance to prevent connectivity issues.
- Keep devices updated with the latest software and perform resets to address persistent pairing problems.
- Monitor battery levels and manage usage settings to optimize performance and extend battery life.
Establishing a Stable Connection
Ensuring Proper Pairing Procedures
To avoid the frustration of failed connections, ensure your Bluetooth headphones are in discovery mode and your phone’s Bluetooth setting is active. Begin by placing both devices close to each other, as distance can impede pairing success. Your headphones will typically signal readiness through a blue blinking light, indicating they are in pairing mode.
Follow these steps to pair your devices successfully:
- Fully charge your Bluetooth headphones before attempting to pair.
- Activate Bluetooth on your phone and ensure it is searchable.
- Enter pairing mode on your headphones, usually by holding down the power button.
- On your phone, select your headphones from the list of available devices.
If your headphones still refuse to connect, consider resetting them or consulting the manual for specific troubleshooting steps. Remember, a secure pairing is crucial, so always pair devices in a private setting to prevent unwanted connections.
Checking for Physical Barriers and Distance
Bluetooth technology is designed to provide a seamless wireless connection, but physical barriers can significantly impact its performance. Walls, furniture, and other solid objects can weaken or disrupt the signal, leading to connectivity issues. It’s essential to minimize obstructions between your Bluetooth headphones and the connected device to maintain a stable link.
Another critical factor is distance. Bluetooth connections generally have an optimal range within which they operate most effectively. Exceeding this range can result in a loss of connection or poor audio quality. As a rule of thumb, try to stay within a 10-meter radius of the connected device to ensure uninterrupted service. If you experience issues, consider relocating closer to the device or removing any potential barriers that could be causing interference.
Remember, other electronic devices can also cause interference, leading to skipping or dropouts. It’s advisable to keep your Bluetooth headphones away from other wireless gadgets when in use to prevent such disruptions.
Updating Device Software
Keeping your Bluetooth headphones functioning smoothly often requires updating the device software. This process can resolve many connectivity issues and ensure compatibility with your devices. For instance, brands like Bose provide a straightforward method to update your product, either by connecting it to a computer via USB or wirelessly from their update site.
To manually check for updates on devices like Chromebooks, follow these steps:
- Select the System clock in the bottom-right corner.
- Click on the Gear icon to access Settings.
- Navigate to ‘About Chrome OS’ on the left.
- Click ‘Check for updates’ to search for the latest version.
- If an update is available, select ‘Restart’ to complete the installation.
If you encounter issues during the update, such as an error message, ensure you have a stable internet connection and consider restarting your device to resolve any connection problems. Regular software updates can prevent unexpected behavior, like the bizarre blinking of lights on your Bluetooth headphones, and enhance overall performance.
Troubleshooting Persistent Pairing Problems
Resetting Your Bluetooth Headphones
When your Bluetooth headphones start acting up, a reset might be the necessary fix. This process can clear any minor glitches and restore the headphones to a state that’s ready for a fresh pairing attempt. Here’s how to reset most Bluetooth headphones:
- Turn off your headphones.
- Press and hold the power button for a specified duration, often around 5-10 seconds.
- Wait for a confirmation signal, such as a sound cue or a light pattern change.
- Turn the headphones back on and enter pairing mode.
If the problem persists after a reset, it’s worth testing the headphones with other devices to isolate the issue. Should the headphones work fine with other devices, the problem may lie with the original device’s Bluetooth settings or hardware. For specific reset and initialization instructions, refer to the user manual or the manufacturer’s support website. If you need further assistance, reaching out to customer support can provide you with tailored guidance.
Clearing Bluetooth Settings on Your Device
When your Bluetooth headphones start acting up, one effective strategy is to clear the Bluetooth settings on your device. This can often resolve conflicts that arise from old pairings or corrupted data. Here’s how you can go about it:
- Navigate to your device’s settings menu.
- Locate the Bluetooth section and tap on it.
- Find the list of paired devices and select the one you’re having trouble with.
- Choose the option to forget or delete the pairing.
After clearing the settings, attempt to re-pair your headphones. Ensure that both the headphones and your bluetooth device, are in pairing mode and near each other. This simple process can be the key to a stable and uninterrupted Bluetooth connection.
Seeking Further Assistance
When all else fails and your Bluetooth headphones continue to exhibit bizarre blinking lights, it may be time to seek professional help. Manufacturers often provide dedicated support channels for their products. You can usually find these on the company’s website or through the product’s documentation.
If you’ve exhausted the troubleshooting steps and still find yourself at a loss, don’t hesitate to reach out for further assistance. Many companies offer a customer service link, such as this one, where you can get personalized help. Remember, persistent issues may require a more in-depth look by a technician who can diagnose and resolve complex problems.
For those who prefer a step-by-step guide, consider looking up resources like ‘How to Fix Bluetooth Pairing Problems – Techlicious’. Such articles can provide additional insights and tips, including the common causes of pairing problems and practical solutions to fix them.
Maintaining Uninterrupted Connectivity
Managing Interference and Obstacles
Interference from other electronic devices is a common culprit behind Bluetooth connectivity issues. To ensure a stable connection, it’s important to manage the environment around your Bluetooth headphones. Here are some steps to minimize interference:
- Stay within Range: Keep devices within the optimal Bluetooth range, typically up to 10 meters.
- Battery Levels: Ensure your devices are adequately charged to prevent connection drops due to low power.
- Relocate: Move away from other wireless devices or appliances that may cause interference, such as microwaves or fans.
- Open Spaces: Walls and large obstacles can weaken the signal; try using your headphones in more open areas.
If you’ve taken these steps and still experience issues, it may be worth exploring the specific layers of your device’s Bluetooth implementation. In some cases, adjustments to the device’s internal settings or a factory reset can resolve persistent interference problems.
Monitoring Battery Levels for Optimal Performance
Keeping an eye on your headphone’s battery levels is crucial for uninterrupted audio enjoyment. Regularly checking the battery status can prevent unexpected shutdowns and maintain consistent performance. Most modern headphones provide a way to monitor the battery level and life either through an LED indicator, a voice prompt, or a companion app.
To ensure your headphones are always ready for use, follow these simple steps:
- Power on the headphones to activate their status features.
- Access the battery health information to see the number of cycles and capacity loss.
- Observe CPU usage and temperature as these can indirectly affect battery life.
- Run automatic tests to troubleshoot any apparent issues with battery performance.
Remember, battery life can vary based on settings and usage conditions. If you experience rapid battery drain, consider updating the software, resetting, or initializing your headphones as these steps can often resolve such issues.
Testing with Alternate Devices
When experiencing connectivity issues with your Bluetooth headphones, it’s wise to test them with alternate devices. This step can help determine if the problem is isolated to a single device or if it’s an issue with the headphones themselves. Start by pairing your headphones with a different smartphone, tablet, or computer. Observe if the blinking behavior persists across various devices.
To ensure a thorough test, follow these guidelines:
- Pair the headphones with at least two additional devices.
- Check for consistent performance across all devices.
- Note any discrepancies in connectivity or audio quality.
If the headphones work flawlessly with other devices, the issue may lie with the original device’s Bluetooth settings or hardware. Conversely, if problems are consistent across multiple devices, the headphones might require a firmware update or professional servicing. Remember to document your findings, as this information can be crucial for troubleshooting or when seeking further assistance.
Resolving Audio Stream Interruptions
Disabling Notifications and Pop-ups
When you’re immersed in your favorite tunes or in the middle of an important call, the last thing you want is an annoying interruption. Disabling notifications and pop-ups on your device can prevent these unwanted breaks in connectivity. This is especially crucial during activities that require your undivided attention, such as workouts or presentations.
To ensure a seamless audio experience, follow these simple steps:
- Navigate to your device’s settings menu.
- Locate the ‘Notifications’ or ‘Sound & Notifications’ section.
- Adjust the settings to disable or minimize interruptions.
Remember, some devices may require you to perform these steps for each app individually. By customizing your preferences, you can enjoy uninterrupted audio playback and maintain a stable Bluetooth connection.
Quick Bluetooth Toggle Fix
When faced with Bluetooth connectivity issues, a simple yet effective solution is to toggle the Bluetooth feature off and on. This acts as a quick reset for the connections and can often resolve minor glitches. Ensure that any required Bluetooth codes are still valid and that devices are correctly paired after the toggle.
To perform a Bluetooth toggle:
- Access the Bluetooth settings on your device.
- Turn off the Bluetooth feature.
- Wait for a few seconds.
- Turn the Bluetooth feature back on.
- Attempt to reconnect to your Bluetooth headphones.
This method is particularly useful when devices have been paired correctly but the connection is lost unexpectedly. It’s a straightforward fix that can save time before moving on to more in-depth troubleshooting steps.
Contacting Support for Persistent Issues
When all else fails and your Bluetooth headphones continue to exhibit strange blinking behaviors, it may be time to contact the manufacturer’s support team. This step is crucial, especially if you’ve exhausted all the troubleshooting methods outlined in this article. Reaching out to support can provide you with specialized assistance tailored to your specific model and issue.
Before contacting support, ensure you have the following information ready:
- Your headphone’s model number
- The device you’re trying to connect to
- A description of the issue and any troubleshooting steps you’ve already attempted
This information will help the support team understand your problem better and provide a more efficient solution. Additionally, many manufacturers offer a range of support options, including live phone or chat assistance, step-by-step troubleshooting guides, and helpful videos. Remember, by resolving product issues, you not only fix your immediate problem but also contribute to environmental sustainability by extending the life of your headphones.
Optimizing Headphone Usage and Battery Life
Understanding Usage Conditions and Settings
To optimize your Bluetooth headphone usage and extend battery life, it’s crucial to understand the conditions under which you use your device. The remaining battery charges of the left and right earbuds can differ, which is often a result of the specific settings and conditions of use. For instance, if one earbud is designated for taking calls or activating voice assistants more frequently, it may drain faster than the other.
When assessing battery performance, consider the following factors:
- Volume level
- Active noise cancellation usage
- Ambient temperature
- Frequency of calls and voice assistant activation
These variables can significantly impact how long your headphones last on a single charge. If you notice a discrepancy in battery life, ensure that your headphones are updated to the latest software version, as manufacturers often release updates that improve battery efficiency and overall functionality.
Performing Software Updates and Resets
Keeping your Bluetooth headphones’ software up-to-date is crucial for ensuring optimal performance and resolving any blinking issues. Firmware updates often contain fixes and enhancements that can prevent or correct erratic behaviors. To perform an update, connect your headphones to the manufacturer’s app or software on your computer and follow the on-screen instructions.
If updates don’t resolve the blinking, a reset may be necessary. This process varies by device but generally involves the following steps:
- Turn off your headphones.
- Press and hold the power button or a specific reset button for a set duration, as specified by the manufacturer.
- Release the button and turn the headphones back on.
Remember, a reset will likely erase all paired devices and settings, so you’ll need to re-pair your headphones afterward. If you’re unsure about the process, consult the user manual or the manufacturer’s website for detailed instructions.
Initiating Headphone Initialization
When all else fails, initializing your headphones can be the key to resolving persistent issues. This process restores your headphones to their factory settings, potentially eliminating any glitches or errors that have developed over time. Initialization should be your last resort, as it will erase all saved settings and preferences.
To initiate headphone initialization, follow these steps:
- Visit the provided link to access the initialization instructions specific to your model.
- Follow the step-by-step guide to reset your headphones.
- After resetting, the headphones will enter Bluetooth pairing mode, indicated by a flashing blue and red light or double blue flashes.
If the problem persists even after initialization, testing the headphones with other compatible devices can help determine if the issue is with the headphones or the connected device. Should you require further assistance, the manufacturer’s support page offers additional resources and contact information.
Conclusion
In summary, addressing the blinking light issue with your Bluetooth headphones often involves simple, quick fixes. Ensuring your devices are charged, within range, and free from interference can make a significant difference.
Remember to keep your headphones and phone updated, and don’t hesitate to reset and initialize your devices if problems persist. If you’ve tried all the tips and still face issues, testing with other devices or seeking further assistance may be necessary. With these strategies, you can enjoy uninterrupted audio and seamless connectivity.
Frequently Asked Questions
How do I ensure my Bluetooth headphones pair correctly?
Ensure your headphones are fully charged, in discovery mode, and close to your device. Activate pairing mode, usually by holding the power button, and make sure your phone’s Bluetooth is on and previous devices are forgotten if necessary. If pairing fails, consider resetting your headphones.
What can I do if my Bluetooth connection keeps dropping?
Stay within a 10-meter range of your device, ensure both the device and wireless headphones themselves are charged, and minimize interference from other wireless devices. If issues persist, try resetting and initializing your headphones, and check for software updates.
Why is my audio streaming interrupted and how can I fix it?
Audio interruptions may be caused by notifications or pop-ups. Disable these if you need uninterrupted audio or quickly toggle your Bluetooth off and back on to re-establish the connection. For persistent issues, contact support.
What should I do if my headphones’ battery is draining quickly?
Check if your headphones are running the latest software update. If the problem continues, reset and initialize your headphones to troubleshoot. Consult your user manual or online resources for specific steps.
How can I resolve persistent pairing problems with my Bluetooth headphones?
Reset your headphones and clear any saved Bluetooth settings on your device that might cause conflicts. Ensure both devices are nearby and in pairing mode. If problems continue, seek further assistance.
What steps should I take if my headphones are not working with alternate devices?
Test the headphones with different devices to see if the issue persists. If it does, reset and initialize the headphones using the provided links. For further assistance, contact the support team through the provided contact link.